The longer a patient requires mechanical ventilation, the more likely it is that the patient will have a tracheostomy. Tracheotomy is one of the most common procedures performed on the critically ill patient. The longer a patient requires mechanical ventilation, the more likely it is that the patient will have a tracheostomy.1 Here, we will discuss indications, benefits, potential complications, and nursing care associated with tracheostomies.
The most common indication for tracheostomy is the need for long-term mechanical ventilation secondary to chronic respiratory failure. Other indications for tracheostomy include severe facial or or neck trauma or extensive surgery, congenital anomalies or upper airway obstruction.
Advantages of a tracheostomy compared with an endotracheal tube include facilitating oral hygiene, promoting patient comfort, providing a more secure airway, and decreasing the risk of tracheal necrosis.
Some providers believe that a tracheostomy provides additional advantages including decreased length of stay in the CCU, decreased mortality, and faster weaning from mechanical ventilation, but these benefits haven’t been proven.2 Despite the many benefits of tracheostomy, there are also complications associated with it. (See Tracheostomy complications.)
Nursing care
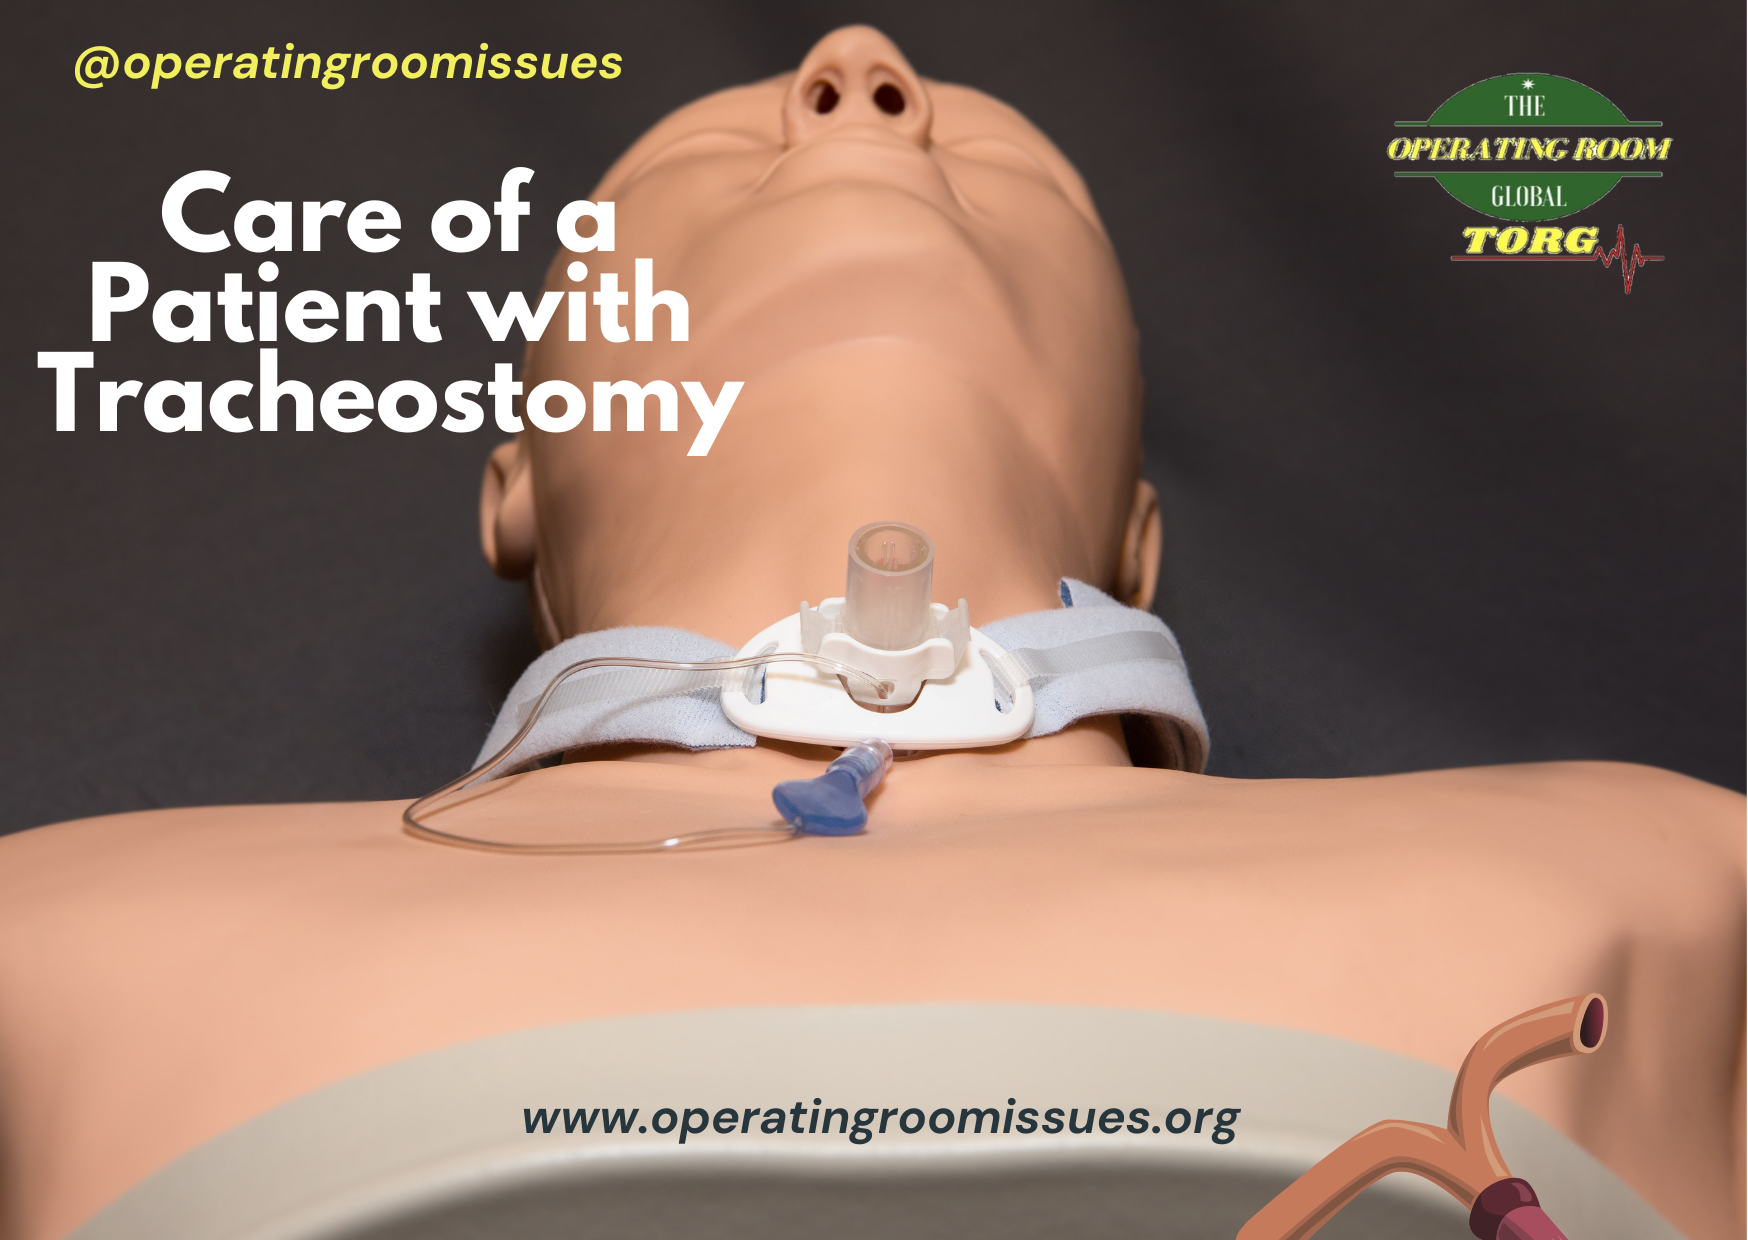
Most nurses were taught tracheostomy care in nursing school. (See Tracheostomy tubes.) When caring for a patient with a tracheostomy, nursing care includes suctioning the patient, cleaning the skin around the stoma, providing oral hygiene, and assessing for complications. Normal functions of the upper airway include warming, filtering, and humidifying inspired air. When a patient has a tracheostomy, the upper airway is bypassed and these functions are lost. Providing humidified air or oxygen, using a t-piece or trache collar, along with appropriate fluid intake, will promote thinning and mobility of secretions and help prevent mucus plugs.2 Because the tracheostomy is a foreign body, secretions will form around the tracheostomy tube. The peristomal area must be kept clean and dry to prevent skin breakdown.
Suctioning
Suctioning should be performed on an as needed basis. Always hyperoxygenate patients prior to and following suctioning to prevent hypoxemia and its associated risks. Closed or in-line suctioning helps to maintain oxygenation during mechanical ventilation, and also decreases the risk of aerosolizing secretions.5 When suctioning a tracheostomy, use a catheter that’s no more than half the inner diameter of the tube and insert to just beyond the end of the tube. A#12 French suction catheter fits most patients.12
Cleaning the inner cannula
Sterile technique and appropriate personal protection gear, including gown and eye protection, are required for providing tracheostomy tube care. Your facility may provide tracheostomy cleaning kits for nondisposable tracheostomy tubes that contain a brush and pipe cleaners for inner cannula cleaning. You must clean off all the secretions using a sterile solution, generally saline.
Some institutional policies recommend full-strength or diluted hydrogen peroxide for cleaning nondisposable inner cannulas, but it shouldn’t be used to clean the skin around the stoma and can damage tissue.6 Don’t use hydrogen peroxide if you’re cleaning a metal tracheostomy as it can damage parts.
If your patient has a tracheostomy tube with a disposable inner cannula, you’ll need a new sterile disposable inner cannula of the same type and size. Some tracheostomy tubes will require a temporary inner cannula while you’re cleaning the inner cannula because the standard connector for all respiratory equipment, including the mechanical ventilator, is part of the inner cannula.6,7 You can also use a new inner cannula while you clean the one you removed.7 Place the cleaned inner cannula in a sterile container for use during the next tracheostomy tube cleaning. Rinse the inner cannula by pouring sterile water or saline solution over it and then replace it in the tracheostomy tube. The inner cannula will turn to lock in place.
Stoma care
Moisten cotton-tipped swabs or a gauze pad with sterile physiologic saline to clean the stoma, the outer cannula, and the faceplate. The peristomal area should be cleaned using a semicircular motion in an inward to outward direction. Pat the skin dry with gauze pads to prevent breakdown. Assess the peristomal skin for signs of infection or irritation. Change the tracheostomy ties if they’re wet or soiled with the help of a team member.6,7 One of you can hold the tube in place while the other changes the trache holder or ties. Assess the skin under the trache ties for any abnormalities. Refer to your facility’s policy for requirements on changing a trache’s holder or ties.
When securing tracheostomy tube ties, only one finger should fit between the patient’s neck and the tie. If you’re using twill tape take a piece twice the diameter of the patient’s neck, attach the ties to one flange, take both ends and place around the neck through the other flange, and knot it close to the flange using a square knot. Finish care by placing a clean precut dressing under the faceplate. Don’t cut gauze to use under the faceplate as the frayed edges can cause irritation. A recent small study evaluated using a solid pectin-based skin barrier instead of gauze with good results, but most trache care procedure guidelines are anecdotal or unsubstantiated.8 Peristomal care should be performed at least every 8 hours, but change the dressing as needed.7
Document that you provided trache care and include the appearance of the peristomal skin and whether you changed the trache ties and inner cannula. Note the type, amount, color, and odor of secretions, as well as the frequency of suctioning.
Keep emergency supplies on hand
Certain emergency supplies should be immediately available at the patient’s bedside and accompany the patient when he leaves the room for any reason to protect your patient from the complications associated with accidental decannulation or tube dislodgement. Emergency supplies include a tracheostomy tube of the same type and size as the one currently in place, as well as a tracheostomy tube one size smaller. If the tracheotomy is less than 7 days old, it may be difficult to replace the tube in case of accidental deccanulation, so an appropriate size endotracheal tube and lubricant should be readily available. Suction equipment, gloves, and a bag-valve-mask, as well as tracheostomy tube ties or other securement device, should also be immediately available.2
A multidisciplinary team approach is recommended when caring for a patient with a tracheostomy to decrease morbidity and mortality.2 If a speech pathologist wasn’t contacted prior to the procedure, consider contacting them within 24-48 hours after the tracheostomy. Speech pathologists can help facilitate swallowing function, as well as communication. This can facilitate successful decannulation.9
Speaking after a tracheostomy
The most common concern that patients have when they’re faced with a tracheostomy is altered verbal communication. The inability to speak provokes anxiety and frustration. When a patient can’t communicate by speaking, a nurse should collaborate with the patient, family, and other staff to determine an effective alternative means of communication.10 Alternatives can include asking simple yes/no questions, providing a communication board, or using pencil and paper or a small dry-erase board. You can also collaborate with speech and respiratory therapy to determine if the patient is a candidate for a speech device to assist with speaking.
There are a variety of methods for achieving speech with a tracheostomy. These include: cuff deflation and allowing the patient to pass air by the larynx; cuff deflation and capping the tube with a finger or speaking valve; or using a special tube with a talk attachment for those who need mechanical ventilation. If the patient no longer requires mechanical ventilation, a fenestrated tube with no cuff inflation can help the patient achieve speech.10
For longer conversations, and if the patient tolerates room air, the patient can use a speaking valve with no inflated cuff. This one-way valve allows the patient to inhale through the tracheostomy, and exhale while passing air by the vocal cords.10

It’s recommended that patients and family members become educated early about tracheostomy care. Nurses should involve them in the care of the tracheostomy whenever possible. This will facilitate a good transition to the next level of care. Caregivers should be given the time and assistance needed to acquire emergency equipment for the home and become familiar with its use.2 The comfort level of the patient and family will be enhanced with early and continuous teaching to facilitate discharge planning.
Conclusion
Caring for a patient with a tracheostomy is best done using a team approach. Everyone should work together to keep the site clean and dry with routine dressing changes and p.r.n. suctioning. Keeping necessary emergency supplies readily available at all times will help you provide the best care to your patients.
Tracheostomy complications
Complications following a tracheostomy can occur immediately after the procedure or much later. A tracheotomy may be surgically performed in the OR, but it can also be done percutaneously at the bedside.
Immediately following the procedure, some bleeding is expected, but continued oozing may require further action and the care provider should be immediately notified. Pulsating bleeding may indicate a tracheoinnominate fistula. This can be addressed immediately with compression to the artery by overinflating the tracheostomy cuff, but the patient will need to have this surgically repaired to prevent exsanguination. The nurse should palpate the peristomal area for subcutaneous emphysema, which may indicate a malpositioned tracheostomy tube–a medical emergency.4
Airway obstruction is a complication that can occur at any time after tube placement. Usually it’s caused by a mucus plug. If the patient has an inner cannula, the nurse can remove and clean it. Suctioning can also help to remove the obstruction.
Over time infection and tracheal issues like granuloma formation, dilation, and ischemia can occur. These can be lessened with meticulous care of the tracheostomy, including cleaning and optimal management of cuff pressures.
Other complications include tracheoesophageal fistulas and tracheal stenosis.4 These can be caused by high cuff pressures or injury during tube placement.
Cuff deflation is recommended once a patient no longer requires mechanical ventilation to prevent complications.2 Some complications may not be evident until removal of the tracheostomy tube and may include problems with swallowing or speaking.
Tracheostomy tubes
A tracheostomy tube is inserted using an obturator in place of the inner cannula. The obturator has a rounded end and provides stability during insertion. On the faceplate or neckplate of the outer cannula, flanges are used to secure the device to the patient using twill tape or a tube holder. A fenestrated tracheostomy tube can be used to assist the patient with speaking and weaning from the tracheostomy tube.
Tracheostomy tubes come in a variety of sizes. Each tube may have a different diameter, length, and even curvature. Different manufacturers size them differently, so a replacement tube should be from the same manufacturer. Tubes may be cuffed for use with a mechanical ventilator or uncuffed. A tracheostomy tube may be metal or plastic; and may or may not have an inner cannula that’s removable. According to the American Thoracic Society, “selection of the optimal tube for any patient will depend upon the collective expertise of the tracheostomy team” as research on optimal choices isn’t available.11 Some tracheostomy tubes have a cuff, which is inflated to provide a closed system to protect the airway and to allow effective ventilation. An inflated cuff can also help prevent aspiration. Recommended cuff pressures are between 20 and 25 cm H2O.6 Higher cuff pressures can cause irritation and damage to the trachea, including tracheal ulcerations and necrosis. Tracheostomy tube cuff pressure should be monitored using a manometer to reduce the risk of complications.3 If no aspiration risk, tracheostomy tube cuffs should be deflated when a patient no longer requires mechanical ventilation.
REFERENCES
- 1. Freeman BD, Morris PE. Tracheostomy practice in adults with acute respiratory failure. Crit Care Med. 2012;40(10):2890–2896.
- 2. Mitchell RB, Hussey HM, Setzen G, et al. Clinical consensus statement: tracheostomy care. Otolaryngol Head Neck Surg. 2013;148(1):6–20.
- 3. Skillings KN, Curtis BL. Tracheal tube cuff care. In: Lynn-McHale Wiegand D, ed. AACN Procedure Manual for Critical Care. 6th ed. St. Louis, MO: Elsevier Saunders; 2011:88–95.
- 4. Kozin E, Straton J, Kapo J. Tracheostomy care #250. J Palliat Med. 2012;15(3):359–360.
- 5. Chulay M, Seckel MA. Suctioning: endotracheal or tracheostomy tube. In: Lynn-McHale Wiegand D, ed. AACN Procedure Manual for Critical Care. 6th ed. St. Louis, MO: Elsevier Saunders; 2011:79–87.
- 6. Morris LL, Whitmer A, McIntosh E. Tracheostomy care and complications in the intensive care unit. Crit Care Nurse. 2013;33(5):18–30.
- 7. Skillings KN, Curtis BL. Tracheal tube care. In: Lynn-McHale Wiegand D, ed. AACN Procedure Manual for Critical Care. 6th ed. St. Louis, MO: Elsevier Saunders; 2011:96–104.
- 8. Chuang WL, Huang WP, Chen MH, Liu IP, Yu WL, Chin CC. Gauze versus solid skin barrier for tracheostomy care: a crossover randomized clinical trial. J Wound Ostomy Continence Nurs. 2013;40(6):573–579.
- 9. Safer care for patients with tracheostomies. The Joint Commission Perspectives on Patient Safety. 2010;10(4):1–11.
- 10. Grossbach I, Stranberg S, Chlan L. Promoting effective communication for patients receiving mechanical ventilation. Crit Care Nurse. 2011;31(3):46–60.
- 11. Tracheostomy Tube Selection: American Thoracic Society Web site. 2014. http://www-archive.thoracic.org/sections/education/care-of-the-child-with-a-chronic-tracheostomy/components-of-tracheostomy-care/tracheostomy-tube-selection.html Copyright 2009.
- 12. Nance-Floyd B. tracheostomy Care: An evidence-based guide to suctioning and dressing changes. American Nurse Today. 2011: 6(7): 14–5,17.
- Parker, Laura C. Nursing Critical Care: November 2014 – Volume 9 – Issue 6 – p 38-41 doi: 10.1097/01.CCN.0000453466.57833.dd