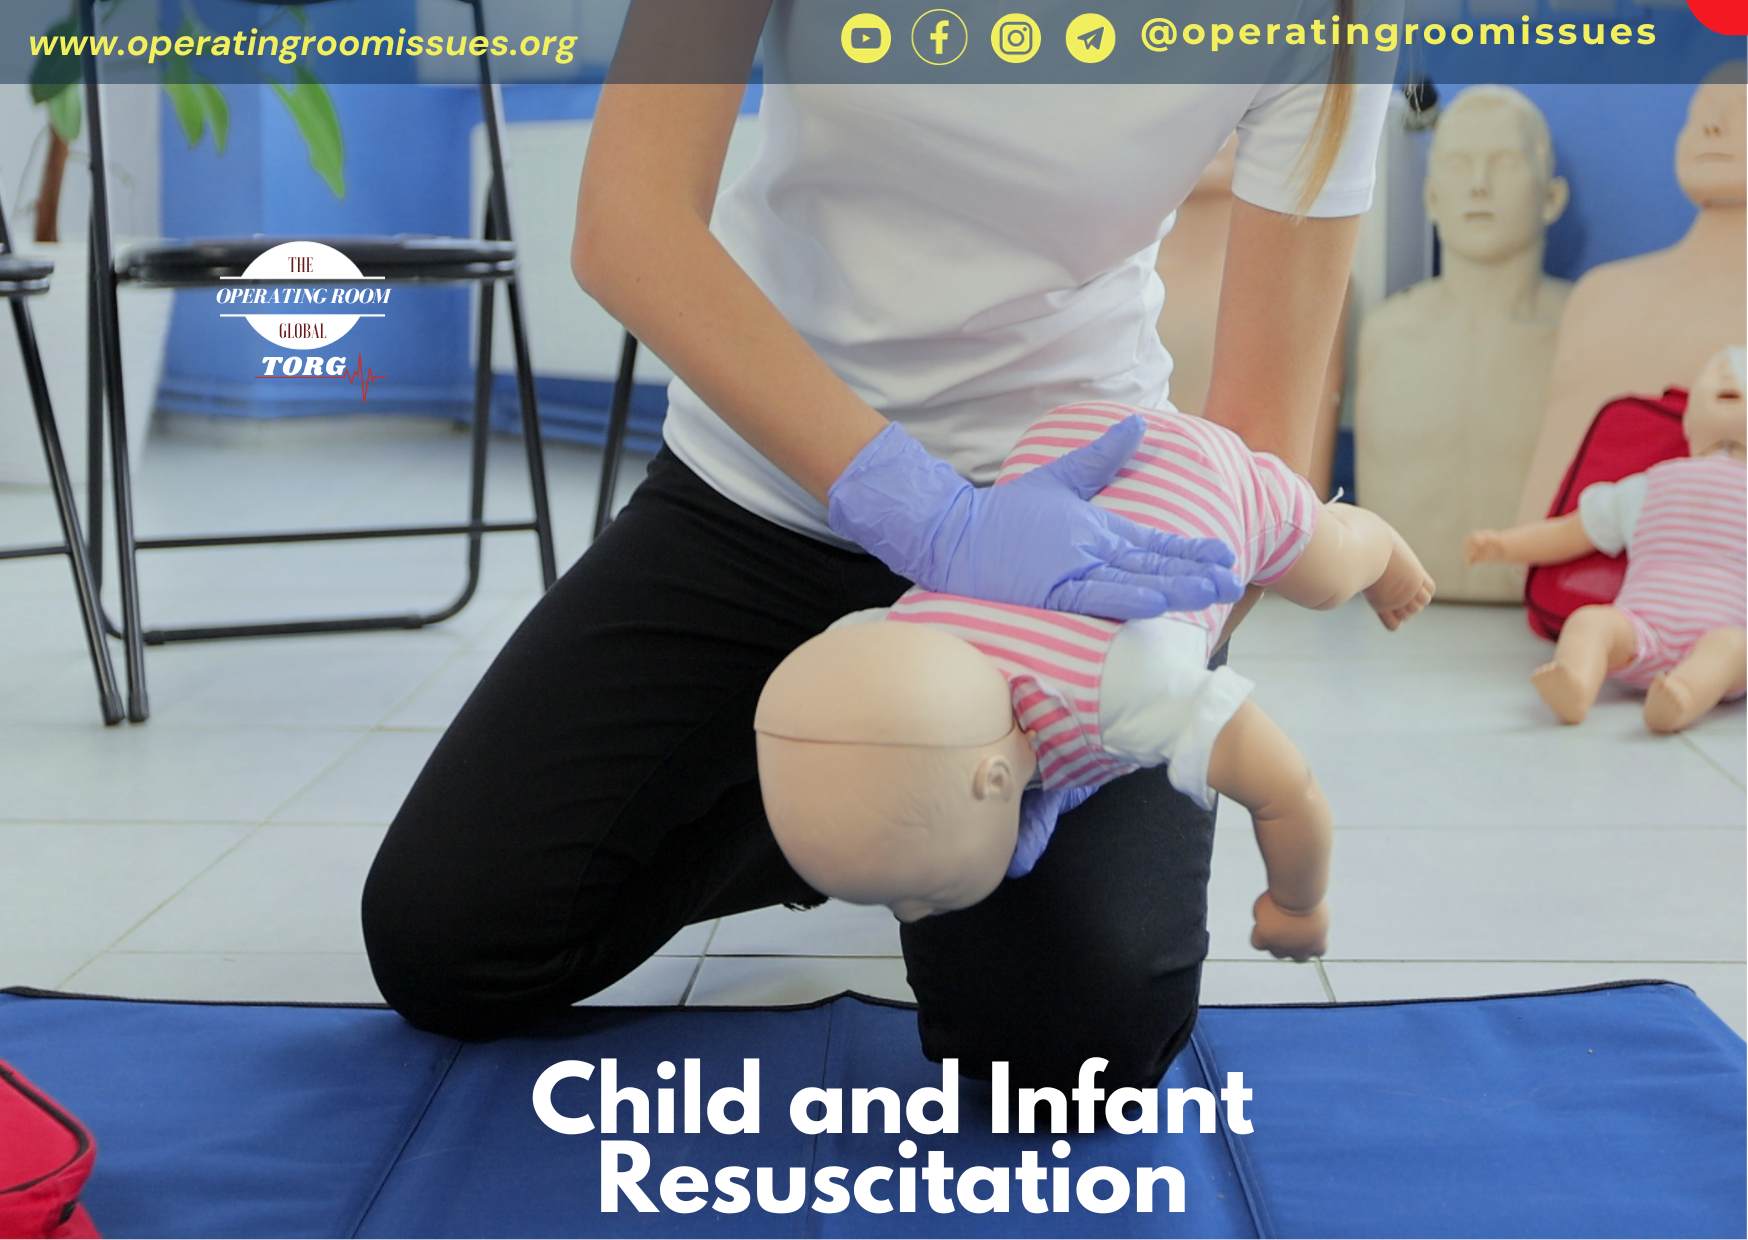
Welcome to a comprehensive guide on paediatric resuscitation, a crucial skill for healthcare professionals and anyone aiming to be prepared for emergencies involving children. In this blog post, we will delve into the essential principles of child resuscitation, emphasizing the importance of quick and effective intervention. From understanding the physiological nuances of paediatric emergencies to mastering evidence-based techniques, we will equip you with the knowledge and skills needed to confidently respond in critical situations. Join us on this professional journey as we explore the protocols and best practices that make a significant impact in preserving young lives.
Get ready to enhance your expertise and contribute to a safer and healthier future for our youngest generation.This blog post provides the full detailed cardiopulmonary resuscitation (CPR) sequence for infants (babies under 1 year old) and children. It’s highly recommended that every parent or carer goes on a first aid course, as it makes this process much easier to understand and remember.
If a baby or child is unresponsive and not breathing normally, call 999 or the designated emergency line for your country and start CPR straight away. When you call 999 for an ambulance, you should be given basic life-saving instructions over the phone, including advice about CPR.
Child and baby CPR steps
- Ensure the area is safe
Check for hazards, such as electrical equipment or traffic. - Check your child’s responsiveness
Gently stimulate your child and ask loudly: “Are you alright?”
3a. If your child responds by answering or moving
Leave them in the position they were found in (provided they’re not in danger).
Check their condition and get help if needed.
Reassess the situation regularly.
3b. If your child does not respond
Call for help.
Carefully turn the child on their back.
If the child is under 1 year old:
Ensure the head is in a neutral position, with the head and neck in line.
At the same time, with your fingertips under the point of your child’s chin, lift the chin. Do not push on the soft tissues under the chin as this may block the airway.
If the child is over 1 year old:
Open your child’s airway by tilting the head and lifting the chin.
To do this, place your hand on their forehead and gently tilt their head back.
At the same time, with your fingertips under the point of your child’s chin, lift the chin. Do not push on the soft tissues under the chin as this may block the airway.
If you think there may have been an injury to the neck, tilt the head carefully, a small amount at a time, until the airway is open. Opening the airway takes priority over a possible neck injury. - Check their breathing
Keeping the airway open, look, listen and feel for normal breathing by putting your face close to your child’s face and looking along their chest.
Look for chest movements.
Listen at the child’s nose and mouth for breathing sounds.
Feel for air movement on your cheek.
Look, listen and feel for no more than 10 seconds before deciding that they’re not breathing. Gasping breaths should not be considered to be normal breathing.
5a. If your child is breathing normally
Turn them on their side.
Check for continued breathing.
Send or go for help – do not leave your child unless absolutely necessary.
5b. If your child is not breathing or is breathing infrequently and irregularly
Carefully remove any obvious obstruction in the mouth.
Give 5 initial rescue breaths (mouth-to-mouth resuscitation).
While doing this, note any gag or cough response – this is a sign of life.
Rescue breaths for a baby under 1 year
Ensure the head is in a neutral position and lift the chin.
Take a breath, then cover your baby’s mouth and nose with your mouth, making sure it’s sealed. If you cannot cover both the mouth and nose at the same time, just seal either with your mouth. If you choose the nose, close the lips to stop air escaping.
Blow a breath steadily into the baby’s mouth and nose over 1 second. It should be sufficient to make the chest visibly rise.
Keeping their head tilted and chin lifted, take your mouth away and watch for the chest to fall as air comes out.
Take another breath and repeat this sequence 4 more times.
Rescue breaths for a child over 1 year
Tilt the head and lift the chin.
Close the soft part of their nose using the index finger and thumb of the hand that’s on their forehead.
Open their mouth a little, but keep the chin pointing upwards.
Take a breath, then place your lips around their mouth, making sure it’s sealed.
Blow a breath steadily into their mouth over about 1 second, watching for the chest to rise.
Keeping their head tilted and chin lifted, take your mouth away and watch for the chest to fall as air comes out.
Take another breath and repeat this sequence 4 more times. Check that your child’s chest rises and falls in the same way as if they were breathing normally.
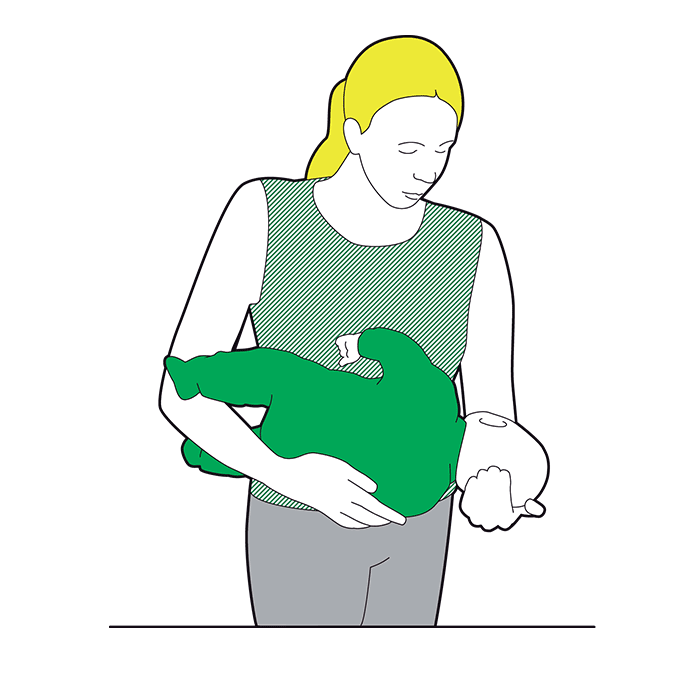
5c. Obstructed airway
If you have difficulty achieving effective breathing in your child, the airway may be obstructed.
Open the child’s mouth and remove any visible obstruction. Do not poke your fingers or any object into the mouth.
Ensure there’s adequate head tilt and chin lift, but the neck is not overextended.
Make up to 5 attempts to achieve effective breaths (enough to make the chest visibly rise). If this is still unsuccessful, move on to chest compressions combined with rescue breaths.
- Assess the circulation (signs of life)
Look for signs of life. These include any movement, coughing, or normal breathing – not abnormal gasps or infrequent, irregular breaths.
Signs of life present
If there are definite signs of life:
Continue rescue breathing until your child begins to breathe normally for themselves.
Turn the child on their side into the recovery position and send for help.
Continue to check for normal breathing and provide further rescue breaths if necessary.
No signs of life present
If there are no signs of life:
Start chest compressions immediately.
Combine chest compressions with rescue breaths, providing 2 breaths after every 30 compressions.
- Chest compressions: general guidance
To avoid compressing the stomach, find the point where the lowest ribs join in the middle, and then 1 finger’s width above that. Compress the breastbone.
Push down 4cm (for a baby or infant) or 5cm (a child), which is approximately one-third of the chest diameter.
Release the pressure, then rapidly repeat at a rate of about 100-120 compressions a minute.
After 30 compressions, tilt the head, lift the chin, and give 2 effective breaths.
Continue compressions and breaths in a ratio of 2 breaths for every 30 compressions.
Although the rate of compressions will be 100-120 a minute, the actual number delivered will be fewer because of the pauses to give breaths.
The best method for compression varies slightly between infants and children.
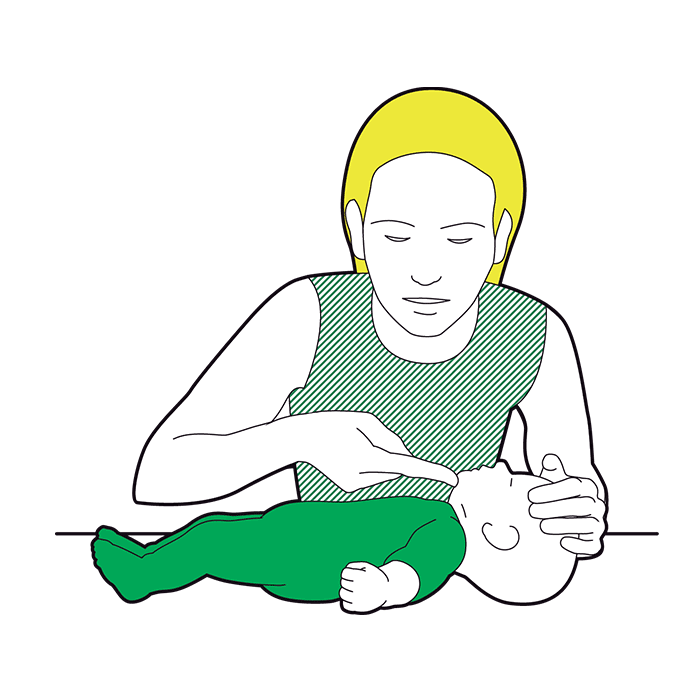
Chest compression in babies less than 1 year
Do the compressions on the breastbone with the tips of 2 fingers, not the whole hand or with both hands.
The quality (depth) of chest compressions is very important. If the depth of 4cm cannot be achieved with the tips of 2 fingers, use the heel of 1 hand.
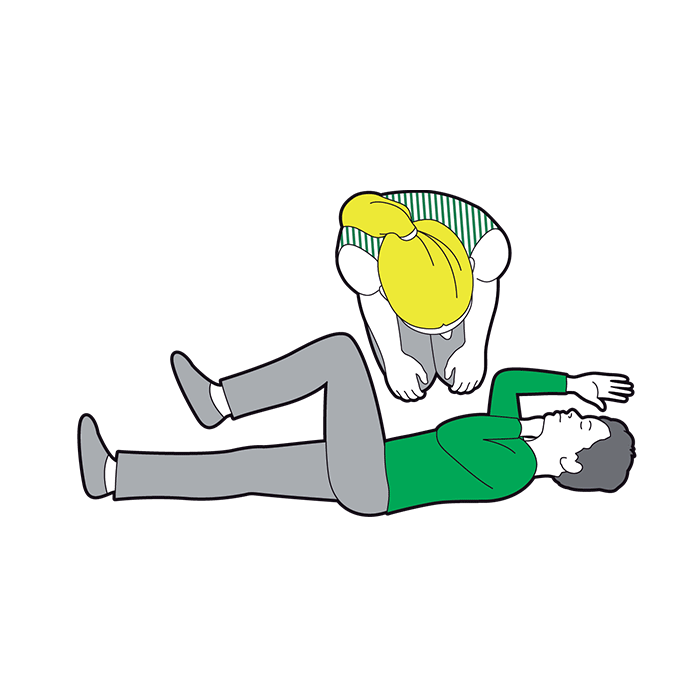
Chest compression in children over 1 year
Place the heel of 1 hand over the lower third of the breastbone.
Lift the fingers to ensure pressure is not applied over the ribs.
Position yourself vertically above the chest and, with your arm straight, compress the breastbone so you push it down 5cm, which is approximately one-third of the chest diameter. The quality (depth) of chest compressions is very important.
In larger children or if you’re small, this may be done more easily by using both hands with the fingers interlocked, avoiding pressure on the ribs.
If you had no response to your call for help and you’re alone, continue resuscitation for about 1 minute before trying to get help – for example, by calling 999.
- Continue resuscitation until
Your child shows signs of life – normal breathing, coughing, movement of arms or legs.
Qualified help arrives.
What is CPR?
CPR stands for cardiopulmonary resuscitation. Knowing how to do CPR can give your baby the best chance of survival.
Rescue breaths must be performed on a child, as cardiac arrest in children is likely to be caused by a respiratory problem.
If a child is unresponsive and not breathing normally, you still need to call 999 or 112 for emergency help and start CPR straight away.
What to do
- After you have performed a primary survey, if you find that the baby is unresponsive and not breathing, you should ask a helper to call 999 or 112 for emergency help while you start CPR.
- If you’re on your own, you need to give one minute of CPR before calling on a speakerphone.
- Do not leave the baby to make the call.
 Place the baby on a firm surface and open their airway. To do this, place one hand on their forehead and very gently tilt their head back. With your other hand, use your fingertip and gently lift the chin.
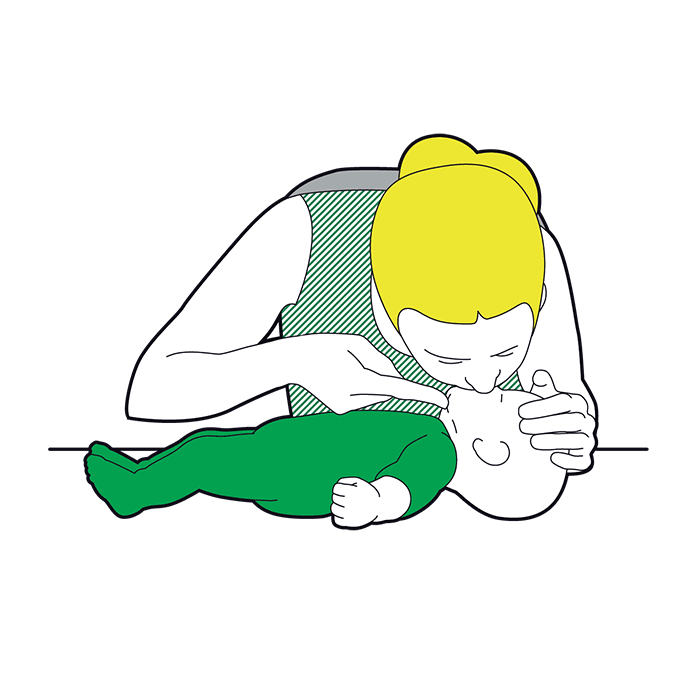 Give five initial puffs. Take a breath and put your mouth around the baby’s mouth and nose to make a seal, and blow gently and steadily for up to one second. The chest should rise. Remove your mouth and watch the chest fall. That’s one rescue breath, or puff.Do this five times.
- If their chest does not rise, perform compression only CPR.
 You will then need to give 30 pumps. Put two fingers in the centre of the baby’s chest and push down a third of the depth of the chest. Release the pressure allowing the chest to come back up.Repeat this 30 times at a rate of 100 to 120 pumps per minute.
- The beat of the song ‘Stayin’ Alive’ can help you keep the right rate.
 After 30 pumps, open the airway and give two puffs. Keep alternating 30 pumps with two puffs (30:2) until:
- emergency help arrives and takes over
- the baby starts showing signs of life and starts to breathe normally.
 If the baby shows signs of becoming responsive, such as, coughing, opening their eyes, making a noise, or starts to breathe normally, put them in the recovery position.Monitor their level of response and prepare to give CPR again if necessary.
How to do CPR on a child
What to do
- After you have performed a primary survey, if you find that the child is unresponsive and not breathing you should ask a helper to call 999 or 112 for emergency help while you start CPR. Ask a helper to find and bring a defibrillator if available.
- If you are on your own, you need to give one minute of CPR before calling on a speaker phone.
- Do not leave the child to make the call or to look for a defibrillator.
 Start CPR. Place them on a firm surface and open their airway. To do this, place one hand on their forehead to tilt their head back and use two fingers from the other hand to gently lift the chin.
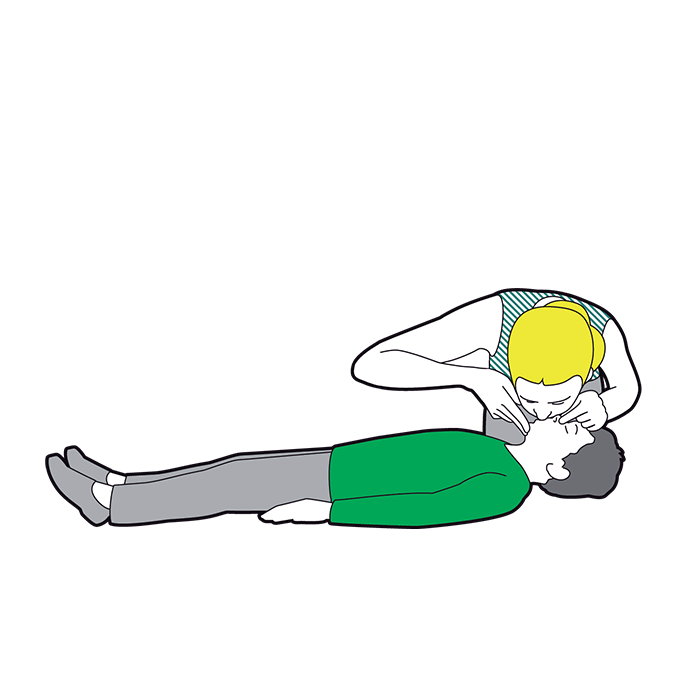 Give five initial rescue breaths.Take the hand from the forehead and pinch the soft part of the nose closed, allowing the mouth to fall open. With the head still tilted, take a breath and put your mouth around the child’s, to make a seal. Blow into their mouth gently and steadily for up to one second, until the chest rises. Remove your mouth and watch the chest fall.That’s one rescue breath. Do this five times.
 You will then need to give 30 chest compressions. Kneel by the child and put one hand in the centre of the child’s chest. Push down a third of the depth of the chest. Release the pressure allowing the chest to come back up. Repeat this 30 times at a rate of 100 to 120 compressions per minute.
- The beat of the song ‘Stayin’ Alive’ can help you keep the right rate.
- After 30 compressions, open the airway and give two breaths.Keep alternating 30 compressions with two breaths (30:2) until:
- emergency help arrives and takes overthe child starts showing signs of life and starts to breathe normally a defibrillator is ready to be used.
- If the helper returns with a defibrillator, ask them to switch it on and take the pads out while you continue with CPR. They should remove or cut through clothing to get to the casualty’s bare chest. They also need to wipe away any sweat.
- The defibrillator will give voice prompts on what to do
- The first pad should be on the upper right side below the collar bone.
- The second pad should be on the casualty’s left side below the arm pit.
- If the defibrillator tells you that a shock is needed, tell people to stand back. The defibrillator will tell you when to press the shock button. After the shock has been given, the defibrillator will tell you to continue CPR for two minutes before it re-analyses.
- If the defibrillator tells you that no shock is needed, continue CPR for two minutes before the defibrillator re-analyses.
 If the child shows signs of becoming responsive such as coughing, opening eyes, speaking, and starts to breathe normally, put them in the recovery position. Monitor their level of response and prepare to give CPR again if necessary.
- If you have used a defibrillator, leave it attached.
References